
Tagging Add-on
This add-on allows you to tag resources and create catalogs to help your users find the resources they need quickly and easily.
Enabling this add-on will add a new “Tagging” configuration view to your Devless admin interface. It will also add a new “Catalog” resource type to your app. Taggs can be used in many ways, but the Catalog resource will allow you to create a view for your users where they can filter and find any resources tagged in a particular way.
Example Uses
For example, maybe you’d like a company phone directory in your app, and you’d like your users to be able to filter the contacts by location or role. Tagging can accomplish this by adding location and role tags to all your Contact resources (a resource type that comes with the basic Devless admin), then create a Catalog resource as your phone directory.
Another example might be an app that provides bonus material to a YouTuber’s Patreon users. The show may want to categorize that bonus material by show, season, and show type. Then they can make a Catalog with these filters so users can find their bonus material for their favorite season or episode more easily.
Getting Started
Let’s make it easy for users to sort through your app’s content. If resources (videos, articles, guides, etc.) are included within a catalog, users can apply filters to the catalog and find what they need quickly. We’ll show you how to create a catalog, tag category, and tags. Then, we’ll add these tags to resources so it all seamlessly comes together. To get started you simply need to enable the add-on:
- Log into the Devless Admin
- Navigate to the Add-ons page for the app you’d like to add your tags to.
- Click to Enable the “Tagging” add-on.
You are now ready to create tags and catalogs for your app.
Manage Tag Categories & Tags
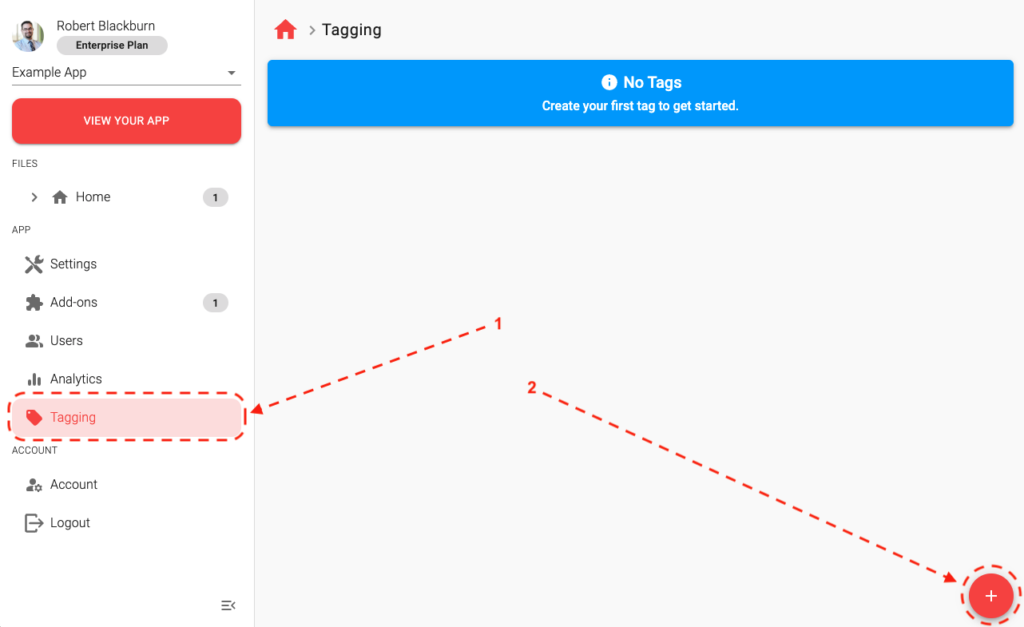
Your tags must be grouped into Tag Categories. For example, if you want to tag your resources with what colors they are (“Red”, “Blue”, “Green”, etc.) then you’d need to make a “Color” tag category for those tags. To do this, navigate to “Tagging” and then click the “+” button. If you do not see the “Tagging” navigation item, make sure you enabled the Tagging add-on under “Add-ons”
You can now give your Tag Category a name (i.e. “Color”). You can also add one or more tags to the category by clicking “Add A Tag”.
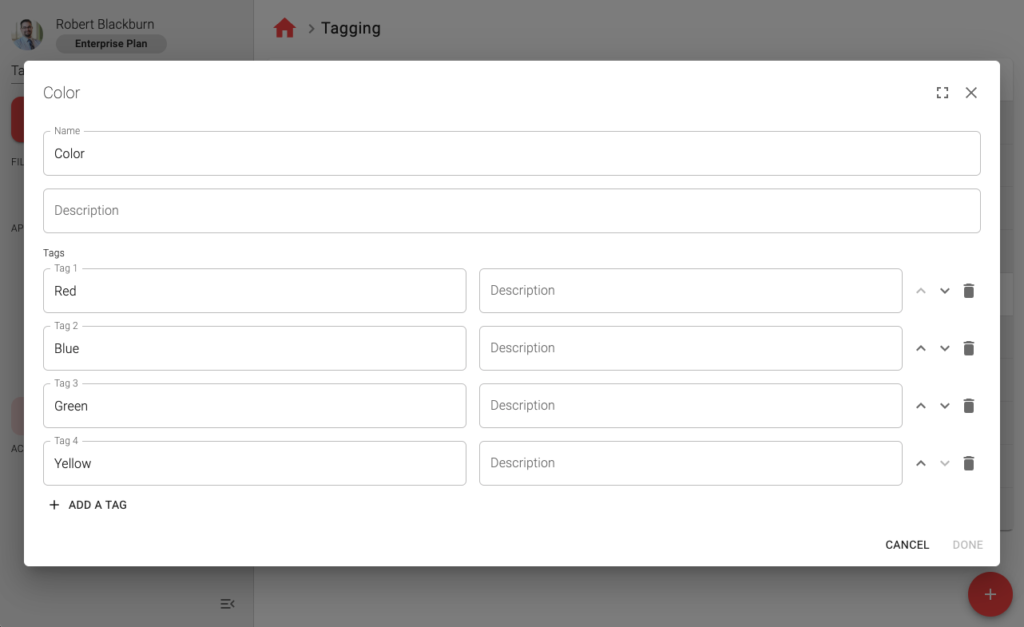
Simply click Done to save this Tag Category and its tags to your app.
Tagging Resource
To apply your tag(s) to a resource, simply:
- Navigate to the resource you’d like to tag.
- Click the more menu (the 3 dots) for the resource you’d like to tag.
- Click the “Tag” option in the menu. Notice that if this resource has been tagged before, you will see a count of how many tags this resource has.
- You will be prompted to select tags for this resource. All the Tag Categories you’ve created for your app will be provided. However, you can leave a category empty, if that category doesn’t apply to this resource.
- Click “Done”.
Create Catalogs
Tags can be used for many things, sometimes even just as informative annotations for your users. However, one of the most common uses of tagging is to create a catalog of resources based on your tags.
You create a Catalog resource like any other resource:
- Navigate to the folder you want to add a resource to.
- Click the “+” icon in the lower left corner.
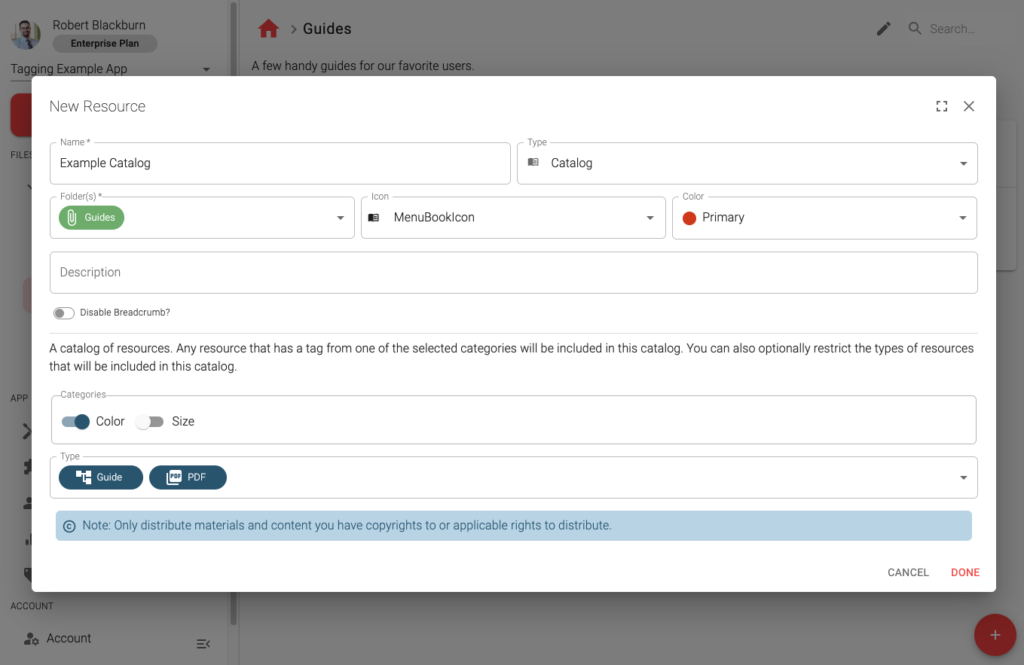
- Give your resource a name and change the resource Type to “Catalog”.
Tip: This add-on and the Guided Support add-on make for a powerful combination. If you tag specific answers in your guide, then link to a Catalog resource later in that guide, the Catalog will detect those tags from the Guide’s responses and automatically apply those tag filters. This creates a seamless experience where your Guides can inform the Catalogs on behalf of your users. You can even chain Guide’s together (make one guide a linked resource in another Guide) and the tags from selected results will be retained through that Guide chain.
Once you have created a Catalog, you will be able to configure the following:
- Enable/Disable Categories: Each Tag Category you have on your app will be listed. You can enable one or more of them, but you need at least 1 enabled.
- Type: You can also limit this catalog by type of resource. If you don’t select any, then all resource types will be allowed. This can be handy if you want to use the tag categories for many different types of resources, but only want this catalog to be for a specific type of resource (i.e. only Contact resources)
Click “Done” and your Catalog is now ready to be used. Click “View Your App” and give it a test!