
App Settings & Branding
You’re here to learn how to configure your app and brand it like a pro! Smart move. Branding is pivotal to your app’s success because it increases awareness, customer confidence, and customer loyalty.
Devless Branding, Settings, & Navigation
We’ve provided a short tutorial video on app settings, applying your unique branding and customizing navigation for your convenience. But, if you prefer reading, then…
Let’s get started!
App Settings
Go to the ‘Settings’ page in the dashboard. All of your design tools are here. We’ll start in the ‘General’ section, where you can configure your app by editing its name, type, home screen, and URL.
The “Name“ of your app can be your brand, company, or a project. You want it to be a short name that your audience can identify with or discover.
The “Type“ of app will start out as a private app (“Registration/Login Required”). This means new users will need to register and log in to gain access to your app. If you have upgraded your plan, you can make the app public by selecting ‘No Registration/Login”. This means anyone will have access to your app’s content, and no registration or login will be required.
The “Home Screen” field sets your app’s home screen to one of 3 options. This is what users will see as soon as they open your app or log in.
- App Root: This displays a screen similar to the “Home” page in Devless Admin, minus any content hidden from the user. It also includes the recently viewed resources.
- Specific Resource: This allows you to set a resource you’ve added as the home screen. After selecting this option, a new field will appear to the right. Start typing the resource name in the field and select it from the search results to assign it. What’s special about this choice is you can assign resources built with our add-ons. like a custom Calkie™ Calculator or a Guided Support document.
- Specific Folder: This shows any of the resources and subfolders of the folder assigned.
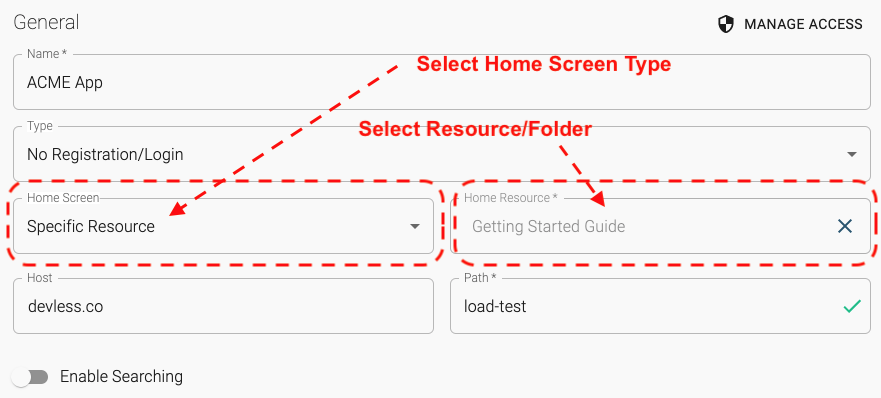
The “Host” and “Path” fields are combined to set the URL of your app. We recommend choosing the most relevant “Host” and a short, descriptive “Path” like your app’s name.
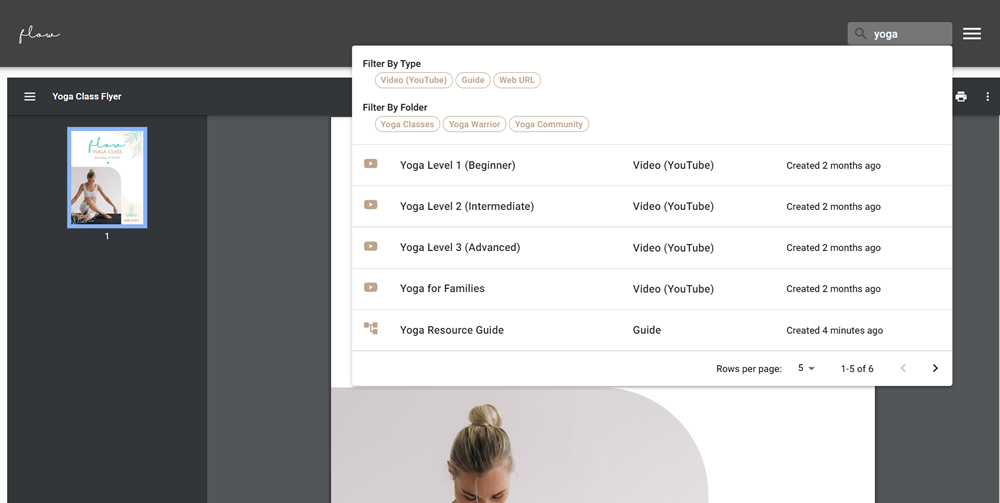
Last in this section is the “Enable Searching” toggle. When on, it will provide users a search field at the top right corner of your app’s screen as seen in the example below. Typing in a search term will yield resources from which the user can further filter by type or by folder. Keep in mind, users can search and locate any resource, even if it’s not otherwise visible.
Branding
Now, let’s bring your app to life by adding your brand’s styling in the Colors/Theme section.
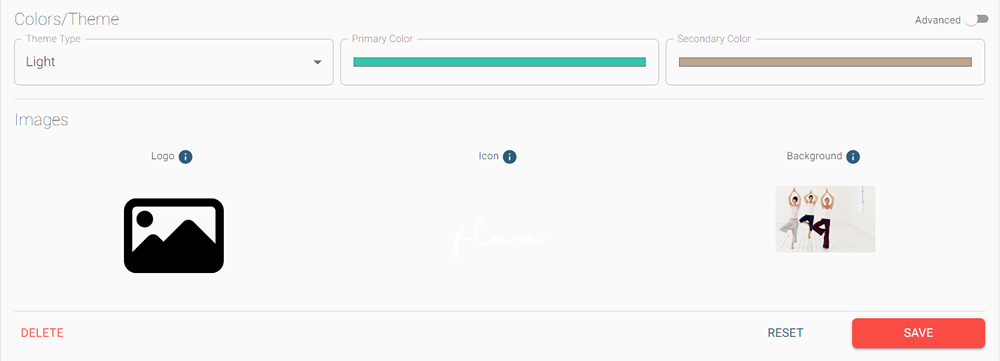
Simply choose between a light or dark theme, then set the primary and secondary colors to match your brand. Use the color picker to make a selection or enter a color code.
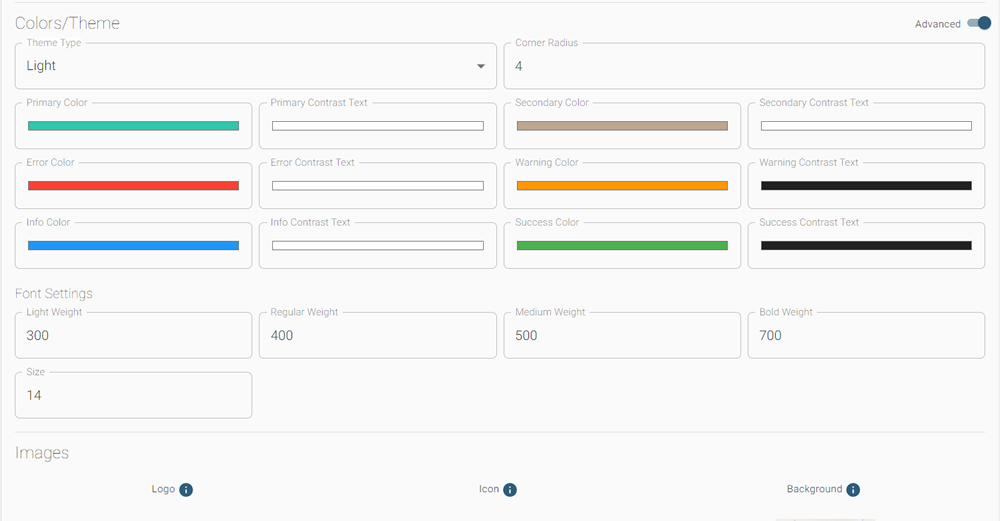
Looking for more color customization? Simply toggle on “”Advanced” to set colors for things like the text, error messages, and more.
Let’s complete your branding with some images. Here, you can make your app instantly recognizable by adding a logo, icon, and a background.
A “Logo” appears in places like the login screen. This is usually the full logo of the company or organization.
An “Icon” shows in the header, or other places that need an icon. This is usually a simpler monochrome icon, but feel free to try out different images to see what you like the most.
A “Background” displays in the background of specific pages, like a feature for the login screen.
When finished, don’t forget to click the save button and review your changes by clicking “View Your App”.
Congratulations, your app is officially branded!
With your app’s increased visibility, you’re on the fast-track to higher customer engagement.
For more Devless documentation and tutorial videos, please check out our Help Center where we make app building super simple for everyone!